We welcome callers
By Appointment only
Contact Details
T: 01892 668497 or
M: 07712 611209
Email:
See Get In Touch or
enquiries@protechrepairs.co.uk
Shipping Address:
Protech Photographic
27 Alderbrook Way
Crowborough
TN6 3EF
![]()
![]()
payments to:
enquiries@protechrepairs.co.uk
Card Payments accepted.
We have images from customers on the Gallery Page - thanks to all our contributors.
More Infrared information on the Infrared Conversions - Filter Choices page.
Links to contributors websites on the Links Page.


We invite customers to explain how they achieve their images to help everyone. There are no rights and wrongs so please use the information in the way it was intended - to assist - thank you.
The following are shots from a customer who had a Lumix GX1 converted to Full Spectrum - this allows the user to fit external filters to the lens giving much more flexibility. Thanks to Julia for her images and explanation of how she obtained them.
Black & White using an R72 Filter
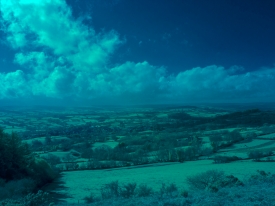
Channel Swapped with R72 Filter
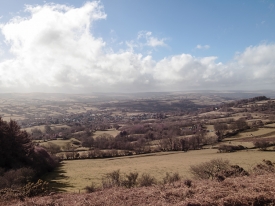
Full Spectrum (ie clear glass) with a Custom White Balance set.
A bit of jiggery-pokery in relatively normal processing, mostly playing with curves.
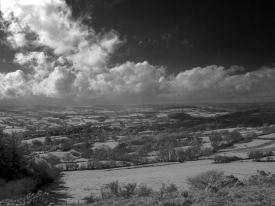
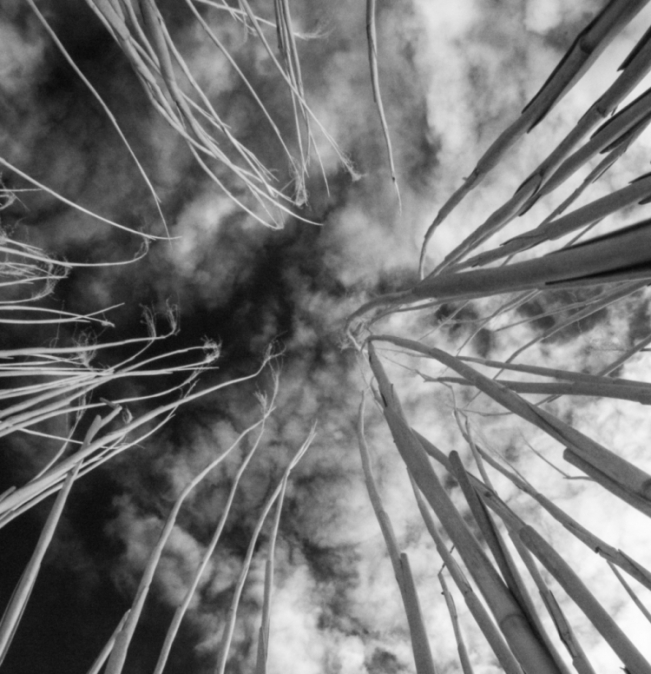
Black & White using 25A (light red - equivalent to 590nm)
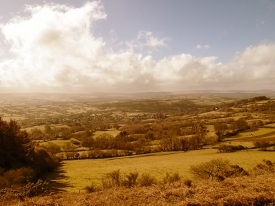
False Colour using 25A (light red - equivalent to 590nm)
Ron French - Canon 40D with 720nm Filter
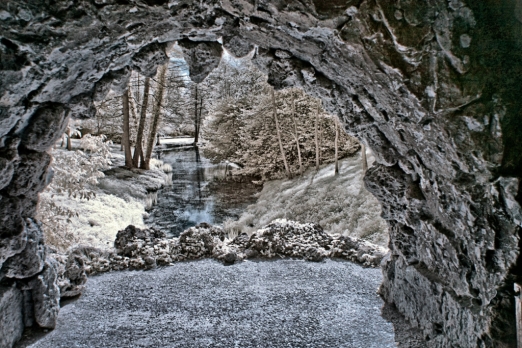
This photo was taken at Stowe gardens NT. There is plenty to keep a photographer happy all day, this one was taken from inside the grotto.
My camera is a Canon 40D converted to infrared by Protech, with the 720nm filter put in. I shoot in Raw mode all the time, I use "instant jpegs from raw" to extract the jpegs when I get home, this saves a bit of space on the memory cards. I only use the Jpegs to see which shots I want to work on.
When I go out I take a shot of the grass that's in sunlight to set my white balance, I do this at least twice - sometimes 3 or 4 times during a session as the IR builds up or goes down during a day, depending on temperature.
I now shoot all IR pictures with the 40D set to Auto Exposure Bracketing, AEB, 1st is standard, 2nd is 1 stop under & the 3rd is 1 stop over.
For most of the shots I use the overexposed frame, it gives me the style of IR that I like, some people might prefer to use the standard frame.
The first thing I do is open the raw file in Photoshop Camera Raw, then I use the "Recovery" slider to as far as it will go, this is to protect the highlights. Add "contrast" and any other adjustment you feel it needs. Then "Open Image" -
now the channel swap - it's a very easy step, but do not be afraid to experiment at this stage, you can introduce colour into the shot by following these steps:
Go to "channel Mixer" the "output channel should be on RED, in the RED box take it to zero, the BLUE box up to 100, change the Output channel to Blue, then the RED box to 90 & the GREEN box to 15 and the BLUE box to zero. This is only starting guide as each picture is different, it also depends on the IR strength at the time of the exposure. It is best to turn this step into an "action" this will save a lot of time, I use several versions of this action to suit the result I want.
Now this is where the green colour comes into the picture, you should have blue picture in front of you, go to "adjustments", "curves" the you will see 3 "eye droppers" lower down the window. Click on the middle one, pick a middle shade and click on it, if the colour is not what you want press ctrl + Z and that will take you back, then choose a slightly lighter or darker shade to click on. You can use the "hue & saturation " sliders to adjust the shades to what you want but always remember that you can vary the amount of colour in the channel swap, make several versions. But the amount of heat, the exposure, the white balance will all have an effect on the final product.
Colin Say - Nikon D50 with 720nm Filter
The RAW file image was opened in Photoshop via Adobe Camera Raw without converting the file, it was then sent to Topaz B + W Effects plugin, exposure, shadow and highlight detail were adjusted and a tone was added, the image was then saved as a Jpeg (once the image is back in Photoshop it can be saved in whatever format is preferred) and printed.
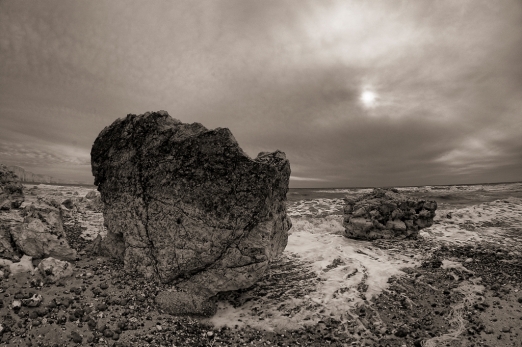
Tony Llewellyn - Nikon D90 with 720nm Filter
It was taken down at Weymouth on a 3 day trip with my local camera club.
I bracketed 3 shots (jpegs). I normally shoot in raw, but on this occasion as i wanted a slightly quicker burst rate i shot in jpeg.
Next I used two of the shots to make a HDR image in photomatix. I then used photoshop CS5 and used content aware to get rid of any ghosting, i then did a black and white conversion (32 red 56 green 12 blue)
Next I used HDR toning and highlights and shadows to tweak the image and bring out the detail.
A small amount of sharpening was used to the final image.
I am really pleased with the end result and am always amazed at what can be achieved with infrared.

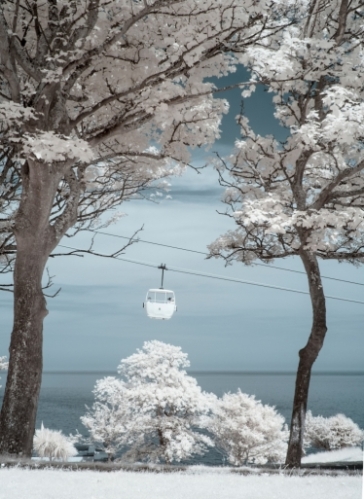
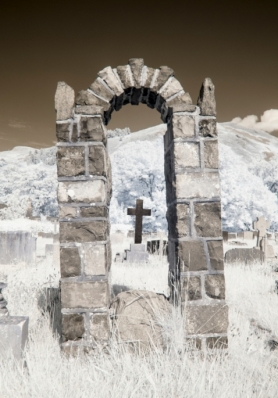
Alan Thompson - Lumix GX1 fitted with Clear Glass & using supplimentary filters
Details of cable car pic
Taken in RAW with the Panasonic GX1 fitted with clear glass and 20mm f1.7 lens. The filter used is a Hoya 720nm.
I had already downloaded for free from the Adobe website Adobe DNG converter and DNG
profile editor. One of the problems with infrared images is they come out pink in the RAW converter and the temperature slider is already at the lowest setting of 2000 and there is no way to cool the image down. This is where the DNG profile editor comes in handy. If you type Adobe profile editor in Google then lots of information comes up and how to do this.
Once a profile is made and loaded in it is easy to get a much cooler image with plenty of movement on the temperature slider in RAW.
So my cable car image opens in RAW and appears very pink at this stage. I then selected camera calibration from the top right in the RAW window, clicked on the drop down menu under camera profile and selected my new infrared profile for the Panasonic GX1. The image is now much more neutral and can be worked on in the basic window changing exposure, highlights etc and opened in Photoshop. A good little tip here is to press the Alt button and you will see Open image change to Open copy which leaves the RAW file as it left the camera without the changes you have just made. Now all I did was to channel swop the red and blue channels in channel mixer to get the bluish sky.
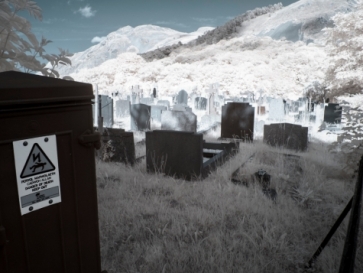
The graveyard scene
This was modified exactly as above but without the channel swop at the end. As I wanted the cross in the centre of the image to stand out I made a selection around the gravestone and used levels to darken it down.
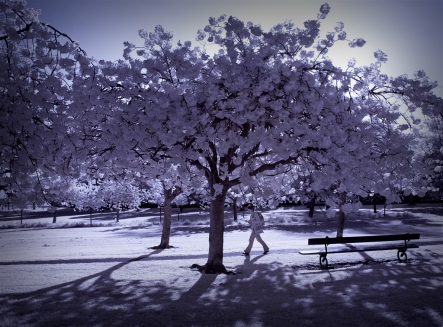
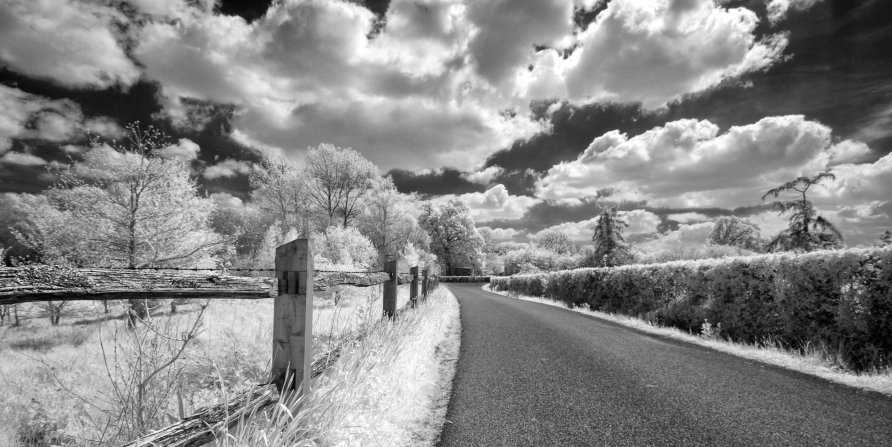
The above image has been sent in by one of our customers, Steve Moull.
We converted a D70s for him around Christmas time and he says "although the weather’s been pretty awful here in the North, I’ve thoroughly enjoyed getting to know it and learning how to see in IR.
Although I’m still very much a novice, I thought you’d like to see a recent effort that’s been accepted as the shot of the month on the ‘Beautiful North Yorkshire’ website"
He has kindly sent us how he obtained the shot below:
My normal processing software is Adobe LR4 and Elements 11. I use them for B&W finishes, but they don’t have the Channel Mixer ** so you can’t use them to channel swap the red and blue colour channels if you want a toned result. On Kelvin’s recommendation, I use Gimp free software if I need to channel swap which is very capable software but I find it slightly confusing to use.
**Update 02/02/2023** There is an add-on available, called Elements+ that opens up hidden features in Elements including channel mixers - kindly advised by Alistair Bolt - he finds it useful for editing IR images and channel swapping.
· Original shot in RAW with D70s + 18-70mm at 25mm, ISO200 and 1/320 at F8
· RAW conversion in LR4 to JPG at default settings except for noise reduction which was set to 0
· Because I wanted a toned result, I opened the JPG in Gimp and swapped the red and blue channels
· Free crop of the image – for this one it was a partial tree from the left of frame, and some blank sky at the top of the frame
· Adjust levels
· Enhance contrast (take care with highlights and adjust if necessary)
· De-saturate from the strong blue tint to a point that gives the desired effect- checking contrast and highlights as you do
· Clone out any dust spots or distracting objects (not necessary for this image)
· Sharpen
· Apply vignette layer – feather 180px, Opacity approx. 45-60
If anyone has any suggestions about how I could have done it better or got similar results more easily, please let me know. I’ve a lot to learn.
________________________________________________________________________________________
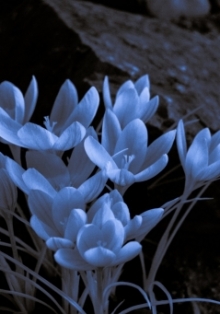
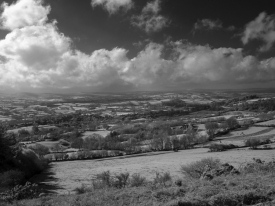
Alex Wee - on flickr as: Qfin
I use lightroom 4 to develop the photo
Set it black and white
Set it to High contrast blue filter
Deepen blacks
Drop highlights to get back some detail
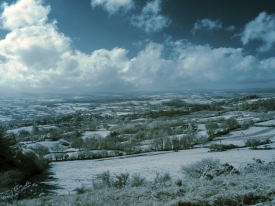
Retrieve shadow detail using 'burning in tool and brush'
Set grain to size - depending on the effect I am after
Fiddle with the sliders until I'm happy with the appearance on the screen
Zoom it to 1:1 to check for blemishes
Take out the dots / blemishes
Crop the image

If you would like to contribute - please send a brief description of how you achieved your results and we will include this on the web site.